Good To Know

When it comes to brewing delicious beer, there are few aspects more important than the yeast. A healthy fermentation allows the malt, hops, and adjuncts to shine. Pitching the right amount of healthy cells helps ensure that the finished beer has the intended alcohol, expected residual sweetness, and appropriate yeast character.  

Over the last four years at Sapwood Cellars we've slowly improved our yeast handling. We've noticed improved fermentation consistency, and better tasting beers. Most of our process is excessive for a homebrewer, but it might give you some ideas!

Harvesting Yeast

We harvest yeast from moderate gravity beers when possible as these cells are less stressed and healthier as a result. Our general rhythm is to brew a pale ale with a fresh pitch, and harvest from that tank for an IPA and DIPA the following week. Once the pale ale fermentation is complete (repeated gravity readings, and no diacetyl or acetaldehyde sensory) we can and soft-crash to 56-58F (13-14C). Cold and dissolved CO2 encourage the yeast to settle out. Specific temperature and time are strain and tank dependent, but that works for most of the English-leaning strains we use (Boddington's, Conan, Whitbread, and the Thiolized-variants).

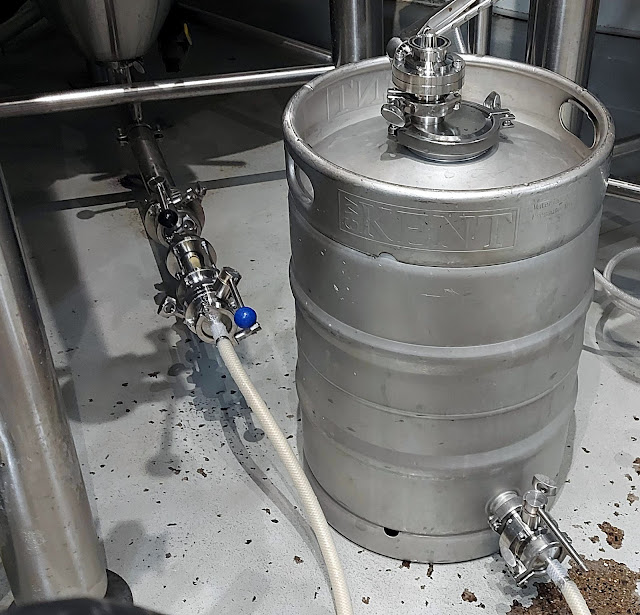
Once the beer has been cold for 24 hours, we attach a 1/2 bbl brink to the bottom of the tank and pasteurize through the line and brink with 180F (82C) water from our on-demand. 25 minutes hot ensures there aren't any stray microbes that will be passed onto the subsequent batches. After pushing out the water with CO2 pressure we spray the brink with cold water then pressurize it and the tank to ~10 PSI. 

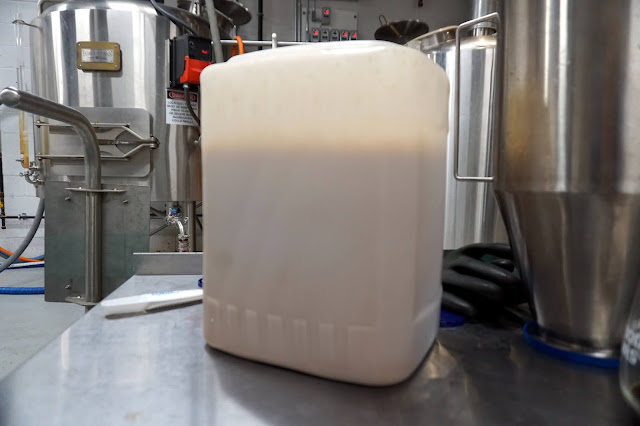
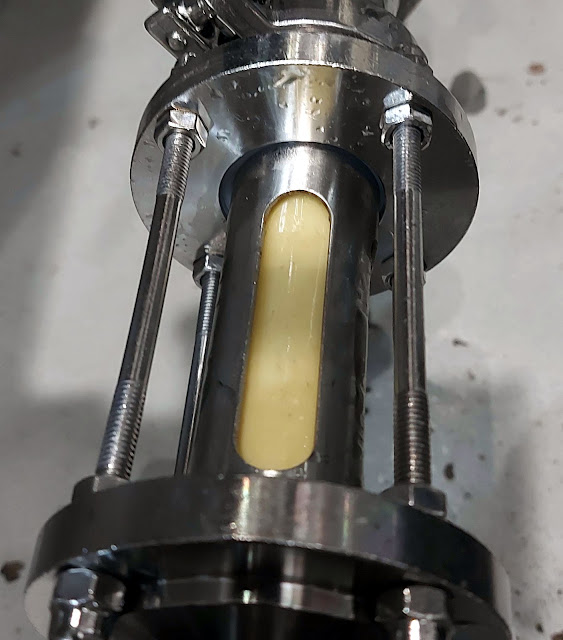
We then dump about a gallon (4L) from the T until the yeast looks good (creamy, off-white) and then begin collecting into the brink. You don't need to dump a large volume of yeast. By keeping steady pressure on the tank and slowly releasing pressure on the brink through the valve at the top we ensure that the yeast won't come out of the cone too quickly (which could punch through pulling in more beer than yeast) and won't foam up in the brink. It takes 10-15 minutes to fill the brink. Usually we are able to collect 110-130 lbs (50-60 kg) before yeast starts coming out the top of the brink. 

We collect yeast before dry hopping to avoid having hops mixed in with the yeast. We also prefer the "less rough" flavor we achieve by dry hopping cold. If you dry hop early-mid fermentation and want to harvest, drop as much of the hops out as you can before crashing and harvesting.

Yeast Storage

Whenever possible we pitch within 72 hours of harvest. Larger yeast cultures generate more heat and thus tend to lose viability more rapidly. Store the yeast as cold as possible, which for us is ~36F (2C) in our walk-in. Ideally that would be closer to 32F (0C) to further slow its metabolism. Shake twice a day to dissipate hot-spots and vent down the pressure to knock-out CO2. If storing the yeast for more than a few days, attach a blow-off line to prevent pressure from building. 

There are studies about various additives for maintaining high yeast viability. We've added phosphate buffer to prevent a drastic pH drop. It's difficult to tell from a single data point, but viability dropped from 95% to 89% after a week of storage. We've seen closer to 10% reductions the handful of times we've stored yeast that long previously.  

We generally won't harvest and repitch beyond three generations (although recently we went to five). That's because with our limited number of tanks, variety of yeast strains, and canning schedule we'd eventually have to hold onto yeast for a couple of weeks before pitching or harvest from a strong beer. 

Determining Cell Count and Viability

There are plenty of successful brewers who pitch a standard weight by barrel/gravity, but knowing how many live cells you actually have is a great way to improve consistency. It's especially valuable if you use a variety of strains or want to bring in a new strain. Our harvests of the same strain can vary by as much as three times in terms of live cells per g of slurry (~.5-1.5 billion cells). The cost of all of the equipment required is ~$500, less than a single commercial 10 bbl yeast pitch from some labs. 

Start by shaking the brink to homogenize the culture. Then run a cup of yeast out, dump it (to avoid counting the cells packed around the port) and then pull a sample. The next step is to dilute the culture to a "workable" concentration - 1:100 for us. Too many cells packed together makes for a culture that is impossible/laborious to count, while too few raises the chances luck will throw-off the count. For a long time I diluted by volume, performing two sequential 10X dilutions with a micropipette. This had two drawbacks. First getting an accurate volume of yeast slurry is tricky because it is foamy and has small bits of trub that can plug-up the pipette. Second, we pitch by weight, so there was always some estimation when it came to converting the volume to a weight or the extra step of determining the physical density of the slurry by mixing with water in a graduated cylinder on a scale. What we do now is dilute by weight, which gives us cells per gram rather than cells per milliliter.

Our scale is accurate to .2 g, so weighing 1 g of yeast into 99 g of water has a ~20% margin of error. As a result I do 490 g of water with 5 g of the yeast slurry. This reduces the maximum margin of error to ~4%. After pouring the diluted culture back and forth to mix, I take 9.9 mL of the diluted culture with the micropipette and add .1 mL of a stock dye solution of Erythrosin B and phosphate buffer (1 g in 50mL of buffer). This results in a total dilution of 100X. You could go even further, a 10X dilution by weight (50 g yeast with 450 g of water) followed by a 10X dilution by volume (1 mL of the diluted culture with 8.9 mL water and .1 g of dye). Live cells are able to expel the Erythrosin B so they won't be stained, meaning any red yeast cells are dead. You can use a variety of other stains, but Erythrosin B is a food coloring and much safer to handle than methylene blue or trypan blue. Here's a post from Escarpmant Labs on using it inspired by my Tweet (which was in turn inspired by this).

Luckily the Boddingtons-type strain we use for most of our batches isn't "excessively" flocculent. When we fermented a run with Whitbread we ran into issues with the cells being too clumpy to count. Luckily BrewKaiser has a whole post on additions you can add to help. Phosphoric acid worked OK, but a local brewer suggested disodium EDTA, which I plan to buy before we do another run with a similar strain. 


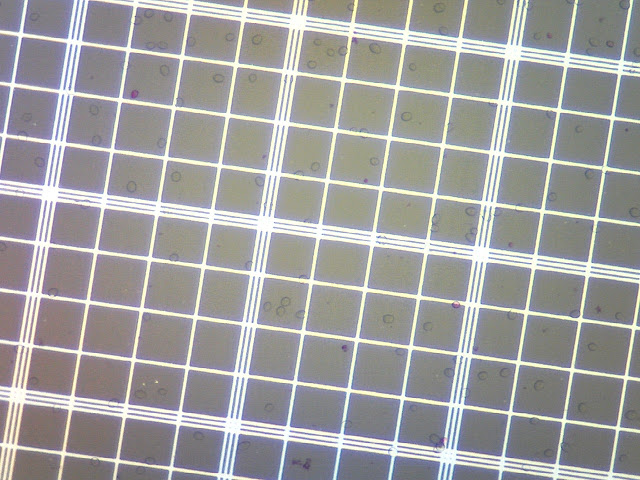
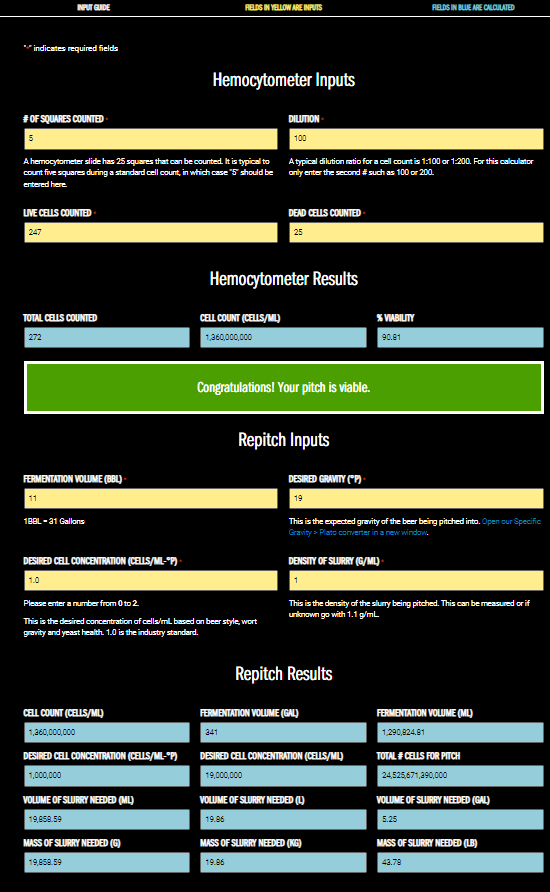
Next, place a couple drops on the diluted culture a hemocytometer, apply the slide cover, and stick it under a microscope (we have an Omax). Count the live and dead cells in five squares (each made up of 25 small squares) - four corners, and center. This provides a large enough sample size to avoid undue randomness. A small tally counter helps keep track. The standard rule is to count cells touching the left and top lines, but not the right or bottom. Count connected cells as two only if the daughter cell is more than half the size of the mother. Then I plug the totals into Inland Island's Yeast Cell Count Calculator. Usually our harvests are 80-90% viable off a fresh pitch, and they tend to go up from there on subsequent generations (90-95%). If your viability isn't great it could either be that the yeast isn't getting enough nutrients/oxygen, your initial pitching rate was too high or low, or that you are waiting too long to harvest.  

There are automated solutions for yeast counting, but with some practice the whole processes will take less than 10 minutes.  


Pitching Yeast

To pitch, we attach the brink to a T inline during knock-out. With the brink on a scale we use CO2 to slowly push in the desired weight of yeast (calculated based on the cell count, wort gravity, and volume). We pitch during knock-out so the yeast mixes with the aerated wort as it goes into the fermentor. White Labs advocates using a pump to pitch their fresh yeast inline to achieve better mixing with the wort. Best practice is to do another cell count off the tank once knock-out is complete to validate your process (we did it a few times, but now trust our approach).

When we started brewing more double batches to fill our 20 bbl tanks, we were pitching enough cells for 20 bbls along with the first 10 bbls of wort. Our thought process was that the yeast wouldn't do much in the 3-4 hours before the second half of the wort went in. However, we found our fermentations were less reliable, often dragging towards terminal gravity, and the yeast from those batches had much lower viability than expected. Both of these issues improved significantly once we switched to pitching only enough cells for the initial knock-out volume. This allows for more growth and thus a higher proportion of younger yeast cells. 

Hopefully this overview of our process is helpful for someone starting a new craft brewery, or looking to take their yeast management to the next level. As with anything in brewing, the more variables you can track and control the more consistency you'll have in your results. Yeast management isn't a "fun" topic, but it is one of the simplest things a brewery can do to increase consistency, improve flavor, and save money!


0 Comments